Setup Vim for Javascript Development
There are a lot of tools that you can use to edit your code, and none of them
more intimidating than vim. There is a saying that a good way to freak out
the non computer savvy public or new linux users is to ask them to close
vi/vim/neovim instance from the terminal.
When I started using linux, I would occassionally end up in situations
where vim was opened by another program (looking at you git) and I did not
know how to manipulate a file, let alone close the program. I would feel very
frustrated, but not sufficiently motivated to learn how to use Vi/Vim.
My "I must learn Vim" moment came when I saw my engineering manager move code
around using only vim and his keystrokes. However, I couldn't make
the switch because:
- I needed a language server for JS/TS (though I feel like I need it wean
myself off language server use) - I needed a linter running in my IDE/text editor.
I would consider myself an early adopter of VSCode, and what set it apart
from other editors(IMO) for JS development was it's inbuilt TypeScript langauge
server. This simplified writing Javascript because you had autocomplete on your
side and a rudimentary linting service provided by the language server.
The de facto linting tool for JavaScript is eslint. Visual Studio does not
ship direct support for eslint but one can download the eslint extension from
the marketplace to get linting on the fly. After installation, you would see
red squiggly lines on offending lines of code. You could right click on the
line and you would be presented with different options for handling the error.
A direct jump to Vim for JS work would mean I would keep syntax highlighting but
I would lose the language server and IDE linting.... or did it? Turns out Vim
can support a language server and a linting service. This can be done using
plugins or scripts, but for this tutorial I shall be using the former. The next
steps assume that you are using VimPlug
as your plugin manager. If that's not the case, you can substitute your package
management system/scripts wherever VimPlug is mentioned.
Setting up a language server #
We have VimPlug up and running, so let's install a language server.
There are several language server packages out there but I chose
coc.nvim, becuase it's an
IntelliSense engine i.e. the same as VSCode. Just like that I have VSCode like
language server engine in my terminal. Shout out to the team that develops this
package.
Open up your .vimrc file and add the following lines in the VimPlug
section.
# rest of you configuration

call plug#begin()
Plug 'neoclide/coc.nvim', {'branch': 'release'}
call plug#end()

# rest of your configuration
Save the document, but don't close Vim yet. Type :PlugInstall and watch
VimPlug do it's magic.
Once that's done, we can now install the TypeScript language server by running
the following command in Vim:
:CocInstall coc-tsserver coc-jsoncoc-tsserver and coc-json are language servers for TypScript and JSON
respectively
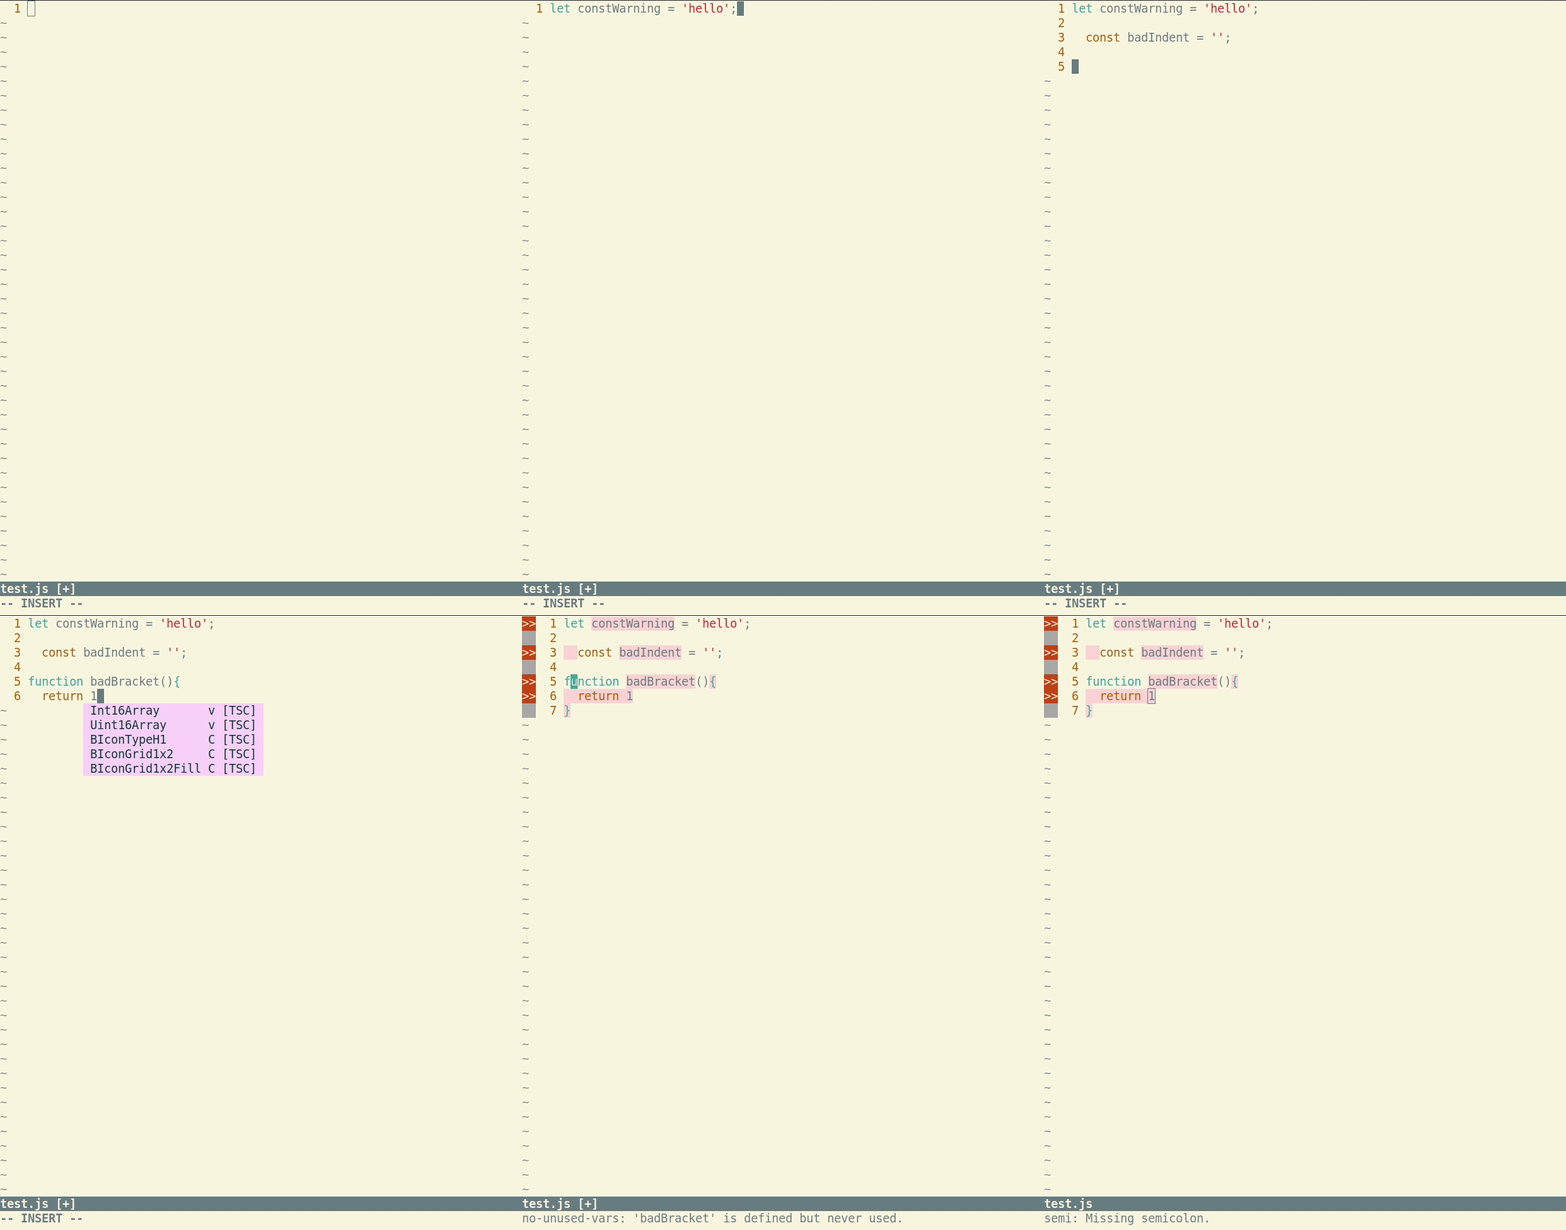
And just like that you have a language server up and running. See the GIF
below to see it in action.

Setting up a linter #
Last step is to setup a linter a.k.a the developer's first defense againt bugs.
I chose ALE for this simply becuase of
the internet activity around it. I have not yet reached the technical
proficiency to tell you how it get's its business done, but I plan to revisit
this topic later so stay tuned for another post.
ALE comes with sensible defaults, but it is highly configurable, including
prettier configuration. I encourage the reader to checkout the documentation
and learn what can be changed.
See some language server + linting action in vim below:

As you can see in the GIF above, ALE will list the errors in the status bar
when you navigate to the "offending line".
Conclusion #
With two easy installation steps, we can go on with JavaScript development in
Vim. I guess the next challenge for me is to become a keystroke guru in Vim.